Here's how to get your garlic harvest ready to last into the new year


Bulbs should dry, but any rust does affect the keeping qualities, so beware.
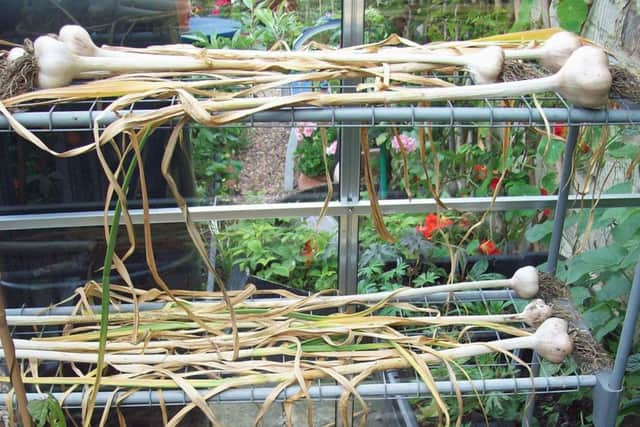
To dry garlic, brush off the majority of the muck and put them somewhere dry and warm – a greenhouse or conservatory would be an ideal location.
Advertisement
Hide AdAdvertisement
Hide AdLay them out on a rack or staging where air can circulate, then just leave them to it.
If you see any black patches developing, trim up the bulb and use them first.
After three to four weeks, the foliage should be off-white and quite dry and crispy.
But if you can see any green left in the stems, or there’s a bit of ‘give’ in them, then leave them to dry a bit longer.
Advertisement
Hide AdAdvertisement
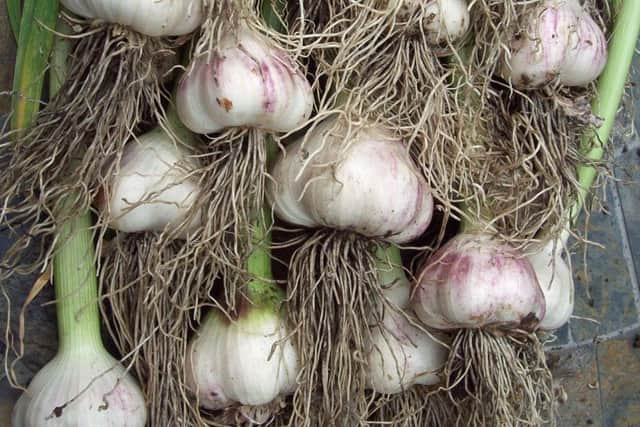
Hide AdNow to clean them off – a filthy job. You’ll need a wide bucket to catch the rubbish, scissors and an old toothbrush.
Trim the roots close to the bulb, but don’t damage the base (the basal plate), or they won’t store well.
Strip off the papery outer layers until the bulb is clean, brush off dirt round the roots with the toothbrush and then trim the stem to the desired length.
I say ‘desired length’ because some of you will want to plait them traditionally.
Advertisement
Hide AdAdvertisement
Hide AdAll I do is bunch about six bulbs together, all different lengths, so the bulbs are not touching, then tie the stems together tightly with twine.
It’s not as pretty, but it is much faster.
Then they are hung in the cellar where it’s dry and cool – and they will usually last well into the new year.
GET IN TOUCH
l For more information, plus cook what you grow, recipes, environmental news and more, log on to the website at www.mandycanudigit.com – which is also now smartphone friendly.
You can also follow Mandy on Twitter @MandyCanUDigIt or you can like me on my Facebook page at Mandycanudigit
JOBS FOR THE WEEKEND
Advertisement
Hide AdAdvertisement
Hide AdPlants with a carpet-like growth habit, e.g. some alpines, can become patchy, with central areas dying off. These patches can be in-filled with gritty compost, to encourage re-growth.
Cutting back plants in baskets followed by feeding can encourage new growth and help revive tired displays.
Some late-flowering border perennials may benefit from a quick-acting feed before they come into bloom, especially if the soil is not very fertile.
Start collecting seed from plants you want to grow next year, especially hardy annuals such as Calendula, poppy, and love-in-a-mist.
Advertisement
Hide AdAdvertisement
Hide AdTake semi-ripe cuttings of shrubs such as Choisya, Hydrangea, and Philadelphus. Root them in pots of gritty compost in a cold frame or even with a plastic bag tied over them.
Clematis can be propagated by taking internodal cuttings (i.e. taking stem sections above and below a leaf, and not cutting the stem immediately below a leaf joint).
Brown patches on conifers may show an earlier infestation by the cypress aphids. Telltale signs include black sooty mould along the stems and shed skin cases. Spraying earlier in the summer may have helped, but once the damage is done, conifers can take a long time to recover. Where hedges are affected prune out brown shoots and tie in neighbouring branches to help fill the gaps.
Cuttings can be taken and grown on in the greenhouse. Fuchsias and Pelargoniums are good candidates.